You might have heard about felting wool. Did you know that there are different ways to felt wool into wonderful crafts?
There are different methods, the famous one being wet felting and needle felting or dry felting method. In this blog, we are going to talk all about needle felting. We will be talking about tools needed for the needle felting method and how you can practice needle felting yourself at home. First of all, let us give you a short introduction to needle felting.
What is Needle Felting?
As the name suggests, needle felting is the process of felting wool into the desired shape using a special needle having a barbed end. Unlike, the wet felting method you do not need water or soap during the felting process. It also does not require any extra time for drying.
A special type of needle with a barbed end is used to stab continuously on the wool fiber to bind them together. The barbed notches at the end of the needle allow the fiber to move towards the center of the shape. It is one of the popular methods to create 3D figures, designs, and patterns in clothes.
Different styles of needle felting have been introduced. Kawai style of needle felting in Japanese culture is one of the famous methods where different cute objects are made by felting. They are small and brightly colored with minimal detail face.
History of Needle Felting
The history of wet felting is widely known but the history of needle felting is less well known. Needle felting was invented in the 1800s to make batting and insulation from shredded woolen garments, soldiers’ hair, and different unusual things.
The first patent for a needle punch machine was given in 1859. Then it was used as an industrial method for creating making carpets, gaskets, dust barriers, and many more.
How Needle Felting is Done?
In needle felting, you neither need soap nor water. The only material that matches the materials required for the wet felting method is wool. Other materials are completely different from the wet felting method. Here we have listed the materials that you need for the felting process.
Required Materials- Needle Felting
Here are the materials required for the felting process.
Wool

You can easily acquire wool for the local market. You do not need roving wool for the felting process, any batt wool will be perfect for the needle felting. The fibers of the batted wool are not uniformly aligned which makes the felting process easier.
Felting Surface
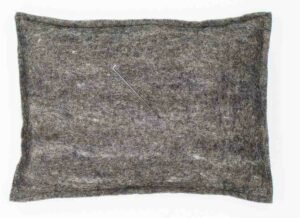
Felting surfaces are usually made of foam or any type of leather. This prevents any stabbing on yourself. It also prevents the wool you are working with from slipping. So you see that the felting surface is to make your work easier and prevent any sort of injury.
You do not need to buy a new felting surface. You can reuse your old clothes and form a ball or a thick rectangle then put it under the wool when you are felting.
Finger Guide
Like felting surfaces, they are there to prevent any injuries to yourself. There will be frequent stabbing, so there are chances of pricking your finger as well. finger guide helps prevent that. You wouldn’t want yourself with a bloody finger when you are felting, do you?
Finger guides are mostly made up of faux leather, suede, or thin metal. You can choose any that matches your preference.
Needle
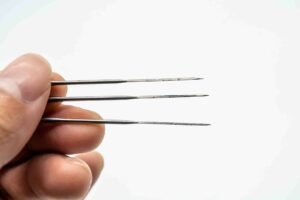
For needle felting, you can not use any kind of needle. You need a special needle made just for needle felting. What makes them special you might think! Felting needles have barbed ends, unlike many common needles.
The barbed ends are made so that the fiber latches onto it and then they are pushed to matt together. The needle is quite delicate and can break if not used properly. So it is crucial to use the right kind of needle properly. The needle should be poked in an up and down motion preventing any harsh movements.
Needle Felting Process
Here is the step-by-step method of how to needle felt.
– Choose wool with the color of your choice and roll it into a ball. Then place it on the felting surface and put your finger guide on your finger.
– Now poke the wool using the special needle. Do not poke very deep. Poke about 1/4 inch deep. Poke in a vertical motion to prevent damaging the needle.
– Repeat the process until the wool is felted properly. You can add more wool to increase the size of the ball. You can be more creative and mix different colors and form different shapes and sizes.
Needle felting is not something that you learn on the first try. It requires lots of practice and consistency. You might face failures and also feel discouraged to finish your craft project. But know that consistency is the key to mastering every skill.
Happy felting!
For All Kinds of Needle Felted and Other Felt Products visit woollyfelt.com.