If you are looking for a hobby to start then why not needle felting? It is fun, great for creative minds to express their creativity, and therapeutic.
You can make cute, meaningful gifts or decors for your home. So consider it as a DIY project to try. You can engage your children also in the activities.
You might be wondering,
How to start needle felting? If so, you have landed in the right place to fuel your interest. Needle felting may sound complicated to ears but it’s not.
With the right basics and information, you can learn needle felting.
You can make needle felting your career as well. Mastering these skills requires a great level of patience and practice.
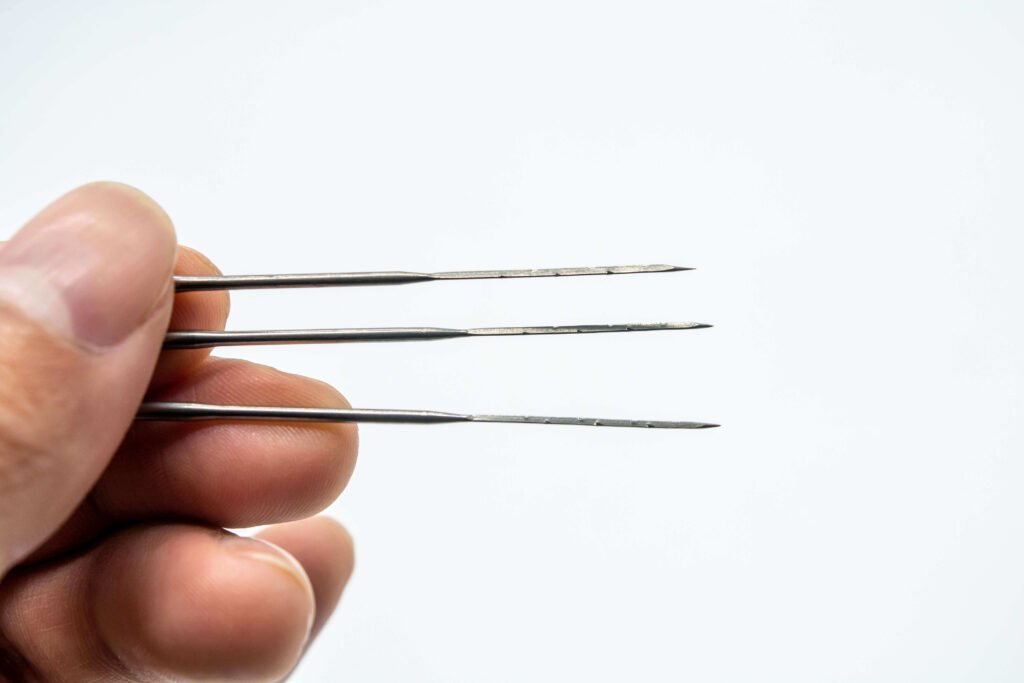 First and foremost you might need a needle specially made for needle felting. Choosing the right type of needle is crucial for a felting job. You might be thinking that any kind of needle is right for the job you will fail before starting.
The needles are brittle and can be easily broken so use them in up and down motion vertically to prevent any breakage. Do not use excessive pressure or twist or bend to pull out the needle when working.
Triangular Felting Needles: Barbs on three sides
32 gauge- for working with coarse fibers and firmly attaching pieces, not ideal for detail work.
36 gauge- for making and attaching 3D figures but not ideal for detail work.
38 gauge- good for bulk work and adding details.
40 gauge- for detail work.
42 gauge- any tiny details like fine hair, a tiny thread of wool.
Star Felting Needles: barbs with four sides
36 gauge- for coarser wool and joining pieces together.
38 gauge-for finer wool and as well as for bulk sculpting work
Reverse Felting Needles
This type of needle is great for creating fluffy texture as the needles go the other way rather than pushing them in as the fiber comes out.
Spiral Felting Needles: Barbs around the needle
This type of needle mostly comes in 38 and 40 gauge making it best for neat finishing and minimizing the surface holes.
Wool Roving vs Wool Batts
Wool roving is the scoured, dyed, and combed batted wool. The fibers are straight, aligned, and come in long lengths, and rolled into balls. Most of the time different colored wool is mixed together to form a gradient through a roving method.
Batted wools on the other hand a step behind from wool roving. It is scoured and dyed only. It comes in a blended form not combed into a particular direction.
First and foremost you might need a needle specially made for needle felting. Choosing the right type of needle is crucial for a felting job. You might be thinking that any kind of needle is right for the job you will fail before starting.
The needles are brittle and can be easily broken so use them in up and down motion vertically to prevent any breakage. Do not use excessive pressure or twist or bend to pull out the needle when working.
Triangular Felting Needles: Barbs on three sides
32 gauge- for working with coarse fibers and firmly attaching pieces, not ideal for detail work.
36 gauge- for making and attaching 3D figures but not ideal for detail work.
38 gauge- good for bulk work and adding details.
40 gauge- for detail work.
42 gauge- any tiny details like fine hair, a tiny thread of wool.
Star Felting Needles: barbs with four sides
36 gauge- for coarser wool and joining pieces together.
38 gauge-for finer wool and as well as for bulk sculpting work
Reverse Felting Needles
This type of needle is great for creating fluffy texture as the needles go the other way rather than pushing them in as the fiber comes out.
Spiral Felting Needles: Barbs around the needle
This type of needle mostly comes in 38 and 40 gauge making it best for neat finishing and minimizing the surface holes.
Wool Roving vs Wool Batts
Wool roving is the scoured, dyed, and combed batted wool. The fibers are straight, aligned, and come in long lengths, and rolled into balls. Most of the time different colored wool is mixed together to form a gradient through a roving method.
Batted wools on the other hand a step behind from wool roving. It is scoured and dyed only. It comes in a blended form not combed into a particular direction.
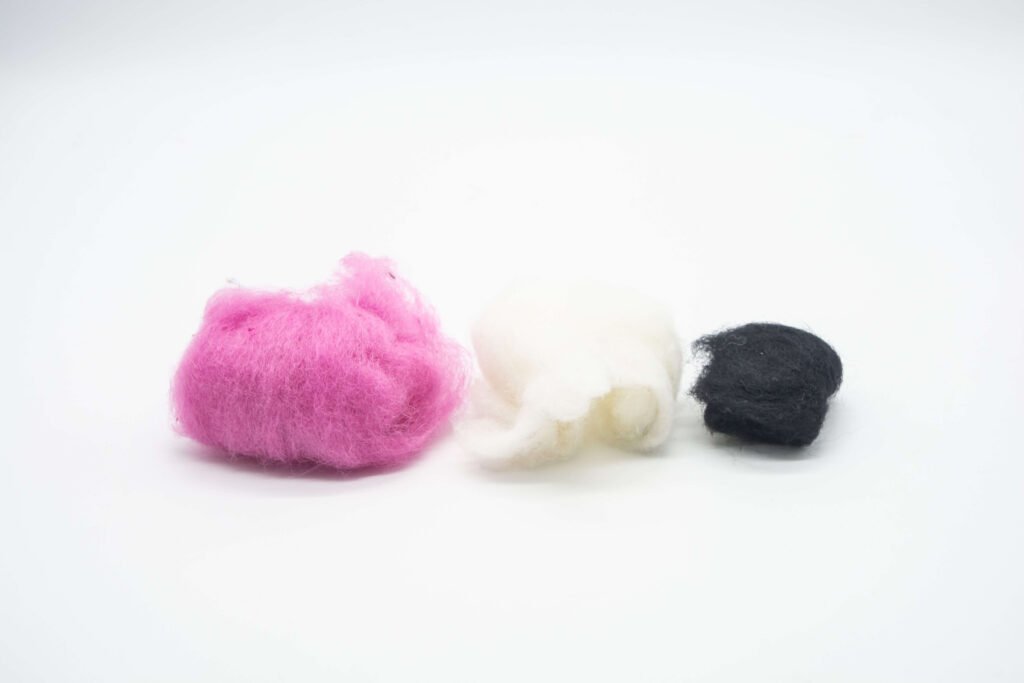 We will be picking batting wool for this process. Beginners find this wool reliable and good to go as it can be spread into desired shapes and sizes.
We do offer batting wool at a great price and with free shipping. Batting wool comes in many colors so, there are various options of colors you can pick to start felt needling.
We will be picking batting wool for this process. Beginners find this wool reliable and good to go as it can be spread into desired shapes and sizes.
We do offer batting wool at a great price and with free shipping. Batting wool comes in many colors so, there are various options of colors you can pick to start felt needling.
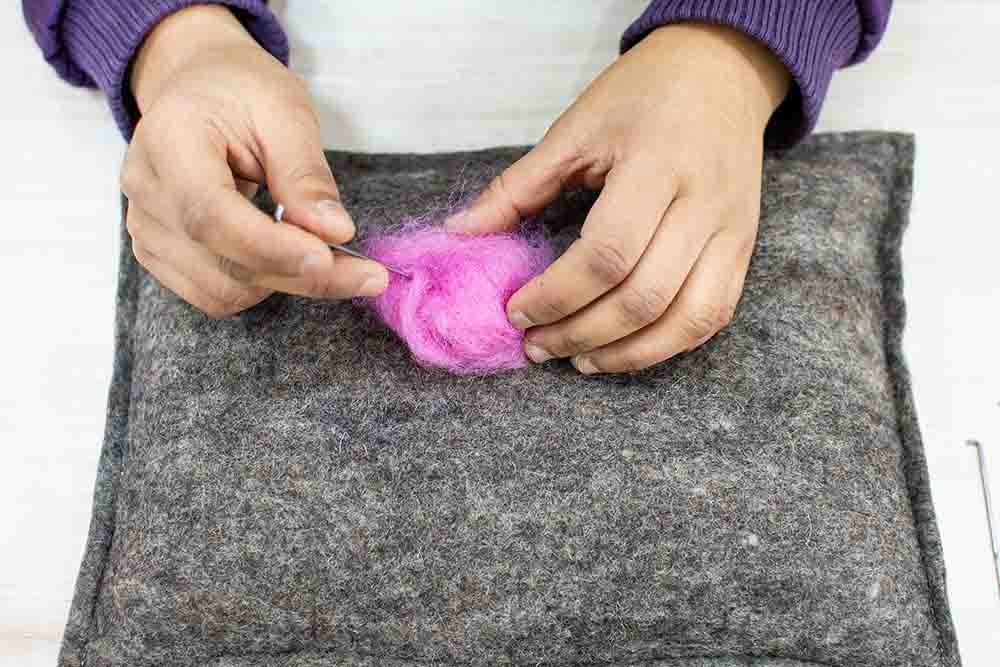 As a beginner, you must be very careful when needle felting. Since you will be working with the needle do not rush the process. Start slow then as you keep on practicing you can increase the speed.
First of all, poke randomly to attach the wool to the surface to make it easy to work. This prevents the wool from moving when working with the felt.
Use a straight pin on the felt to outline your desired shape. For example, if you want a square shape outline it using pins into squares. There might be extra wool left on the outline but don’t worry we will work with that by combining it together to the center.
As a beginner, you must be very careful when needle felting. Since you will be working with the needle do not rush the process. Start slow then as you keep on practicing you can increase the speed.
First of all, poke randomly to attach the wool to the surface to make it easy to work. This prevents the wool from moving when working with the felt.
Use a straight pin on the felt to outline your desired shape. For example, if you want a square shape outline it using pins into squares. There might be extra wool left on the outline but don’t worry we will work with that by combining it together to the center.
Needle Felting – Required Materials
As a beginner, you might be unaware of the required materials, and maybe wondering if you might need some special tools or items. But don’t worry you can start needle felting from scratch. We have listed some material that you need for the felting process.Wool
Different kinds of wool are available in the market. Batting wool, roving wool, and partially-felted wool are easy to find. Batting wool is commonly used wool for needle felting as it is easy to work with for creating shapes and sculptures.Felting Needle
Felting needles are very different from commonly used needles. The special type of needle with tiny barbs is used in needle felting. They are used in up and down motion vertically to combine the fiber to form a stiff shape. Felting needles are quite delicate. Harsh movements like twisting or bending the needle can break it.Felting Surface
To avoid any minor accidents from happening like pricking your fingers, you might need a felting surface. Any kind of felting foam, pillow, or cushion can do the job. We will be poking holes on the surface so be aware of what you use as a felting surface.Finger Guide
If you are a beginner then we recommend you to use a finger guide with you. It is made of leather or thick materials. It protects your finger which minimizes the chance of getting your finger pricked.Things to Consider Before Starting Needle Felting
If you are a beginner then why not start learning needle felting through the basics. This can help you give an idea of how a needle felt and create a habit of using the needle.Deciding the Shape
The shape is the crucial part of felting, deciding the proper shape can enhance the good look of felt products. Most of the time beginners directly jump to needling without focusing a lot on the shape and size. Excluding this step is the mistake which makes the products look dull and unworthy. As a beginner, We recommend you start with basic geometric shapes. Triangle, square, circle and heart shapes are some of the easy and good-to-go shapes which can be decided for the felt. Did you pick the shape? If so, now it’s time to move to the next important process of felting known as the preparation of materials.Preparation of Materials
Let’s prepare all the materials which we will need to start needle felting. Needle
First and foremost you might need a needle specially made for needle felting. Choosing the right type of needle is crucial for a felting job. You might be thinking that any kind of needle is right for the job you will fail before starting.
The needles are brittle and can be easily broken so use them in up and down motion vertically to prevent any breakage. Do not use excessive pressure or twist or bend to pull out the needle when working.
Triangular Felting Needles: Barbs on three sides
32 gauge- for working with coarse fibers and firmly attaching pieces, not ideal for detail work.
36 gauge- for making and attaching 3D figures but not ideal for detail work.
38 gauge- good for bulk work and adding details.
40 gauge- for detail work.
42 gauge- any tiny details like fine hair, a tiny thread of wool.
Star Felting Needles: barbs with four sides
36 gauge- for coarser wool and joining pieces together.
38 gauge-for finer wool and as well as for bulk sculpting work
Reverse Felting Needles
This type of needle is great for creating fluffy texture as the needles go the other way rather than pushing them in as the fiber comes out.
Spiral Felting Needles: Barbs around the needle
This type of needle mostly comes in 38 and 40 gauge making it best for neat finishing and minimizing the surface holes.
Wool Roving vs Wool Batts
Wool roving is the scoured, dyed, and combed batted wool. The fibers are straight, aligned, and come in long lengths, and rolled into balls. Most of the time different colored wool is mixed together to form a gradient through a roving method.
Batted wools on the other hand a step behind from wool roving. It is scoured and dyed only. It comes in a blended form not combed into a particular direction.
Best Wool for Needle Felting
We will be picking batting wool for this process. Beginners find this wool reliable and good to go as it can be spread into desired shapes and sizes.
We do offer batting wool at a great price and with free shipping. Batting wool comes in many colors so, there are various options of colors you can pick to start felt needling.
Felting Surface
Felting surface is important due to various reasons: -It helps to catch the tips of needles while it passes through the wool -It helps to protect the surface from being pin-pricked -Needles pins will not break -Avoid minor accidents like pricking the fingers -Speed up the felting process. It’s not necessary for you to get a new felting surface, you can use other available alternatives as well. You can make a cloth ball using old clothes or any sort of foam and be aware of what you use as a surface as you will be pricking holes.How to start needle felting as a beginner?
As a beginner, you must be very careful when needle felting. Since you will be working with the needle do not rush the process. Start slow then as you keep on practicing you can increase the speed.
First of all, poke randomly to attach the wool to the surface to make it easy to work. This prevents the wool from moving when working with the felt.
Use a straight pin on the felt to outline your desired shape. For example, if you want a square shape outline it using pins into squares. There might be extra wool left on the outline but don’t worry we will work with that by combining it together to the center.