![How to Make Felted Animals A Guide to Crafting Adorable Handmade Decor [DIY Edition]](https://woollyfelt.com/wp-content/uploads/elementor/thumbs/How-to-Make-Felted-Animals-A-Guide-to-Crafting-Adorable-Handmade-Decor-DIY-Edition-q648ds7p67il9q9i545c0uq88a7uxpfffc4i6pbnpc.webp "How to Make Felted Animals A Guide to Crafting Adorable Handmade Decor [DIY Edition]")
Are you a fan of unique and adorable home décor items? If so, have you considered felted animals? These charming creations can add a touch of whimsy to any room, and the best part is that you can make them yourself!
Even if you’re new to felting, fear not – with the proper techniques and materials, creating a realistic felted animal can be a fun and rewarding experience. In this article, we’ll explore the world of felted animals and provide expert tips and tricks to help you create the perfect one for your collection.
From choosing the perfect kind of wool to shaping and adding the finishing touches, we’ll guide you through the art of felting animals. Get ready to unleash your creativity and create a one-of-a-kind felted animal that will smile whenever you see it.
Let’s get started!
 Choosing the ideal wool is crucial to create a felted animal that looks and feels amazing. The type of wool you use can affect your felt animal’s texture, finish, and overall quality. That’s why it’s essential to understand which type of wool is best for felting animals.
Generally, wool with a medium staple length and fine micron count is ideal for felting animals. Merino wool is famous for its softness, fineness, and ease of use. However, feel free to experiment with other wool types like alpaca, cashmere, or even synthetic fibers, which can have unique properties that require different techniques. You can create a unique felted animal with suitable wool and proper techniques.
Choosing the ideal wool is crucial to create a felted animal that looks and feels amazing. The type of wool you use can affect your felt animal’s texture, finish, and overall quality. That’s why it’s essential to understand which type of wool is best for felting animals.
Generally, wool with a medium staple length and fine micron count is ideal for felting animals. Merino wool is famous for its softness, fineness, and ease of use. However, feel free to experiment with other wool types like alpaca, cashmere, or even synthetic fibers, which can have unique properties that require different techniques. You can create a unique felted animal with suitable wool and proper techniques.
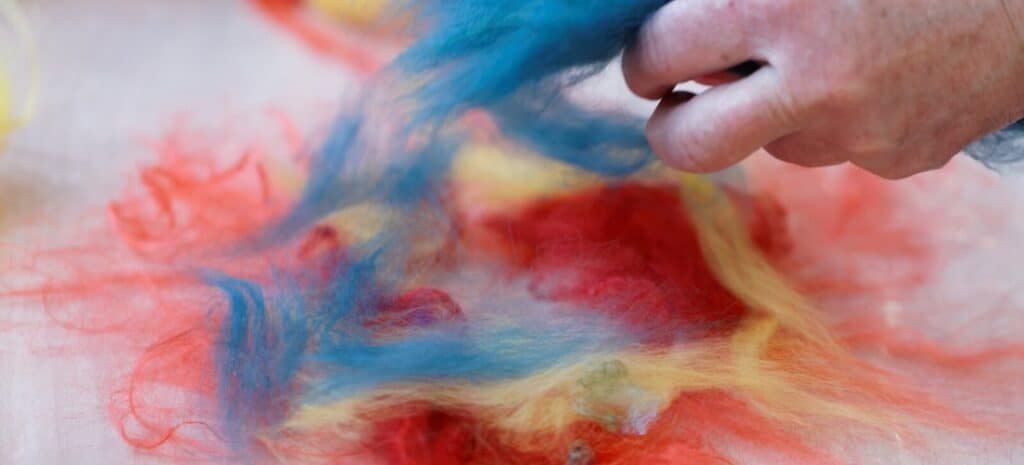
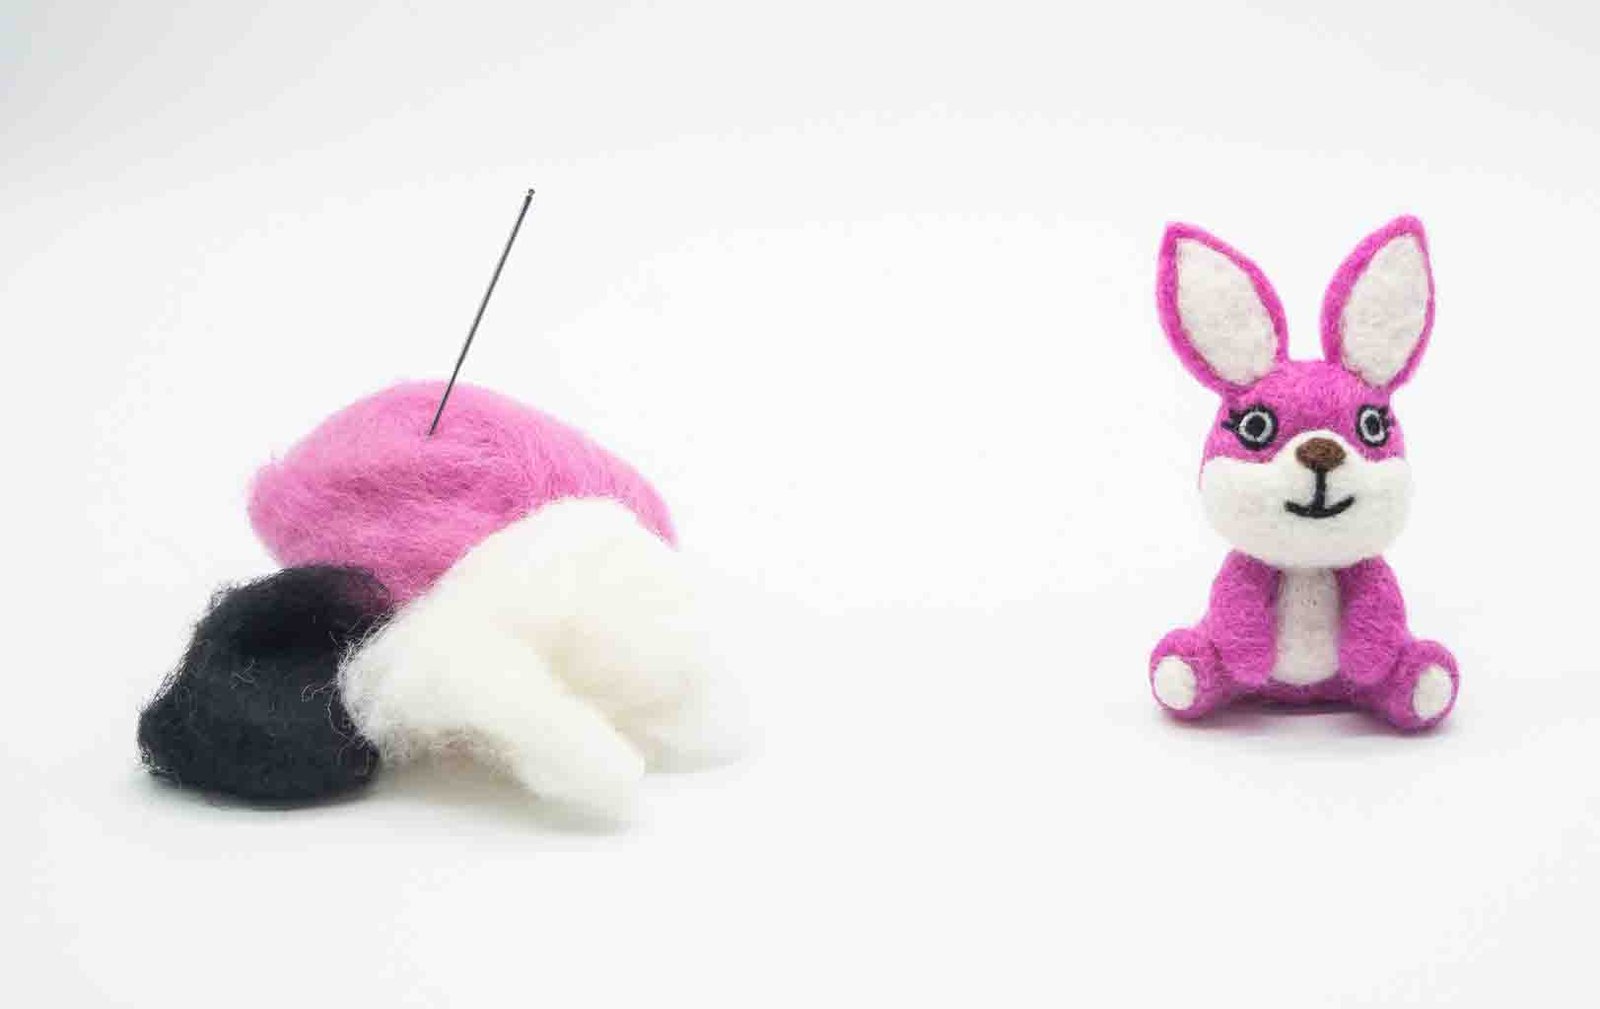
 One of the essential steps in creating a felted animal is establishing its basic shape.
A well-formed structure sets the groundwork for the details and character to bring your felted animal to life. Start by selecting the appropriate wool for the animal you want to make, as different wool types may affect the felting process differently. Once you’ve chosen your wool, you can start shaping it into the basic outline of your animal.
Two popular methods to create a basic shape are free-form and armature-based. The free-form technique manually manipulates the wool using a felting needle and your fingers to create the desired shape. This technique is often used for small or simple shapes, like spheres or cylinders, allowing for greater flexibility and spontaneity in the design. On the other hand, armature-based shaping uses a wireframe to create a more structured and stable shape. This technique is ideal for larger or more complex shapes and provides better support for the details and features you’ll add later.
Once you have created a rough outline, you can refine the shape by carefully felting the wool until it reaches the desired size and shape. Take your time and work in small sections, using a felting needle to poke and shape the wool gently. Pay attention to the proportions and symmetry of your animal’s body so it looks realistic and balanced. By establishing a solid foundation, you can build on the shape and transform it into a lifelike felted animal you can be proud of.
One of the essential steps in creating a felted animal is establishing its basic shape.
A well-formed structure sets the groundwork for the details and character to bring your felted animal to life. Start by selecting the appropriate wool for the animal you want to make, as different wool types may affect the felting process differently. Once you’ve chosen your wool, you can start shaping it into the basic outline of your animal.
Two popular methods to create a basic shape are free-form and armature-based. The free-form technique manually manipulates the wool using a felting needle and your fingers to create the desired shape. This technique is often used for small or simple shapes, like spheres or cylinders, allowing for greater flexibility and spontaneity in the design. On the other hand, armature-based shaping uses a wireframe to create a more structured and stable shape. This technique is ideal for larger or more complex shapes and provides better support for the details and features you’ll add later.
Once you have created a rough outline, you can refine the shape by carefully felting the wool until it reaches the desired size and shape. Take your time and work in small sections, using a felting needle to poke and shape the wool gently. Pay attention to the proportions and symmetry of your animal’s body so it looks realistic and balanced. By establishing a solid foundation, you can build on the shape and transform it into a lifelike felted animal you can be proud of.
 One way to take your felted toys to the next level is by using a reference image for inspiration. Whether it’s a photograph, a drawing, or even a toy, a reference image can be an incredibly helpful tool when shaping your felted animal. By looking at the image, you can better understand the proportions, colors, and textures of the animal you’re trying to create.
When using a reference image, paying close attention to the details is essential. Take note of the animal’s facial features, such as the shape of the nose and the placement of the eyes. You can also study the pattern of the fur or feathers to help you create a realistic texture. Remember, the more attention you pay to these details, the more lifelike your felted animal will appear.
Using a reference image can also help you make creative decisions about your felted animal. For example, you might add a unique twist to the animal by giving it a different coat color or adding accessories like a scarf or hat. The possibilities are endless when you let your creativity run wild. So, grab your reference image, and let’s start creating the perfect felted animal!
One way to take your felted toys to the next level is by using a reference image for inspiration. Whether it’s a photograph, a drawing, or even a toy, a reference image can be an incredibly helpful tool when shaping your felted animal. By looking at the image, you can better understand the proportions, colors, and textures of the animal you’re trying to create.
When using a reference image, paying close attention to the details is essential. Take note of the animal’s facial features, such as the shape of the nose and the placement of the eyes. You can also study the pattern of the fur or feathers to help you create a realistic texture. Remember, the more attention you pay to these details, the more lifelike your felted animal will appear.
Using a reference image can also help you make creative decisions about your felted animal. For example, you might add a unique twist to the animal by giving it a different coat color or adding accessories like a scarf or hat. The possibilities are endless when you let your creativity run wild. So, grab your reference image, and let’s start creating the perfect felted animal!
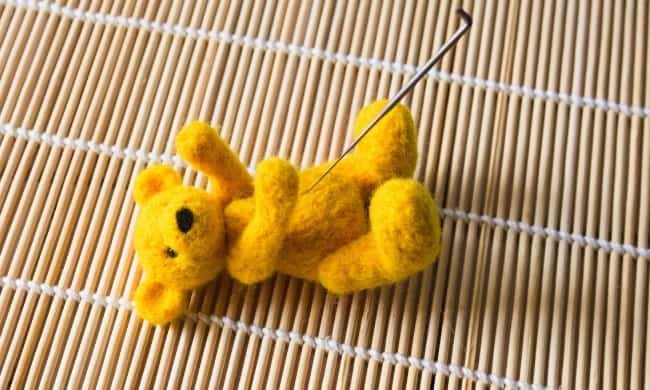
 Adding small details is where your felted animal starts to come to life! Once you have created your animal’s basic shape, you can add all the details that make it unique and special. Whether adding fur to a teddy bear or feathers to a bird, adding details requires patience and attention to detail.
To create realistic texture and depth, it’s best to add details in layers. If making a furry animal, start by felting a base layer of wool to create a smooth surface. Then, add finer fibers on top to create the appearance of fur. Use a felting needle to gently blend the layers, ensuring not to over-felt and lose the fluffy texture. You can also add different colors and shades to create highlights and shadows. For example, adding a lighter shade around the edges of the fur can make it appear more three-dimensional and realistic.
Taking your time and working in small sections is essential when adding details. Focus on one area at a time, such as the head or paws, and then move on to the next. Adding details like facial features, markings, or textures is best. Working in small sections ensures that each part of your felted animal receives the attention it deserves and that the finished product is cohesive and visually pleasing.
Remember, felting is a forgiving medium; you can always add more wool or adjust the shape as you go. If a detail isn’t working out, you can always take it out and try again. And don’t be afraid to experiment! Felting allows for endless creativity, and adding your unique spin to your felted animal can make it even more special and meaningful.
Adding small details is where your felted animal starts to come to life! Once you have created your animal’s basic shape, you can add all the details that make it unique and special. Whether adding fur to a teddy bear or feathers to a bird, adding details requires patience and attention to detail.
To create realistic texture and depth, it’s best to add details in layers. If making a furry animal, start by felting a base layer of wool to create a smooth surface. Then, add finer fibers on top to create the appearance of fur. Use a felting needle to gently blend the layers, ensuring not to over-felt and lose the fluffy texture. You can also add different colors and shades to create highlights and shadows. For example, adding a lighter shade around the edges of the fur can make it appear more three-dimensional and realistic.
Taking your time and working in small sections is essential when adding details. Focus on one area at a time, such as the head or paws, and then move on to the next. Adding details like facial features, markings, or textures is best. Working in small sections ensures that each part of your felted animal receives the attention it deserves and that the finished product is cohesive and visually pleasing.
Remember, felting is a forgiving medium; you can always add more wool or adjust the shape as you go. If a detail isn’t working out, you can always take it out and try again. And don’t be afraid to experiment! Felting allows for endless creativity, and adding your unique spin to your felted animal can make it even more special and meaningful.
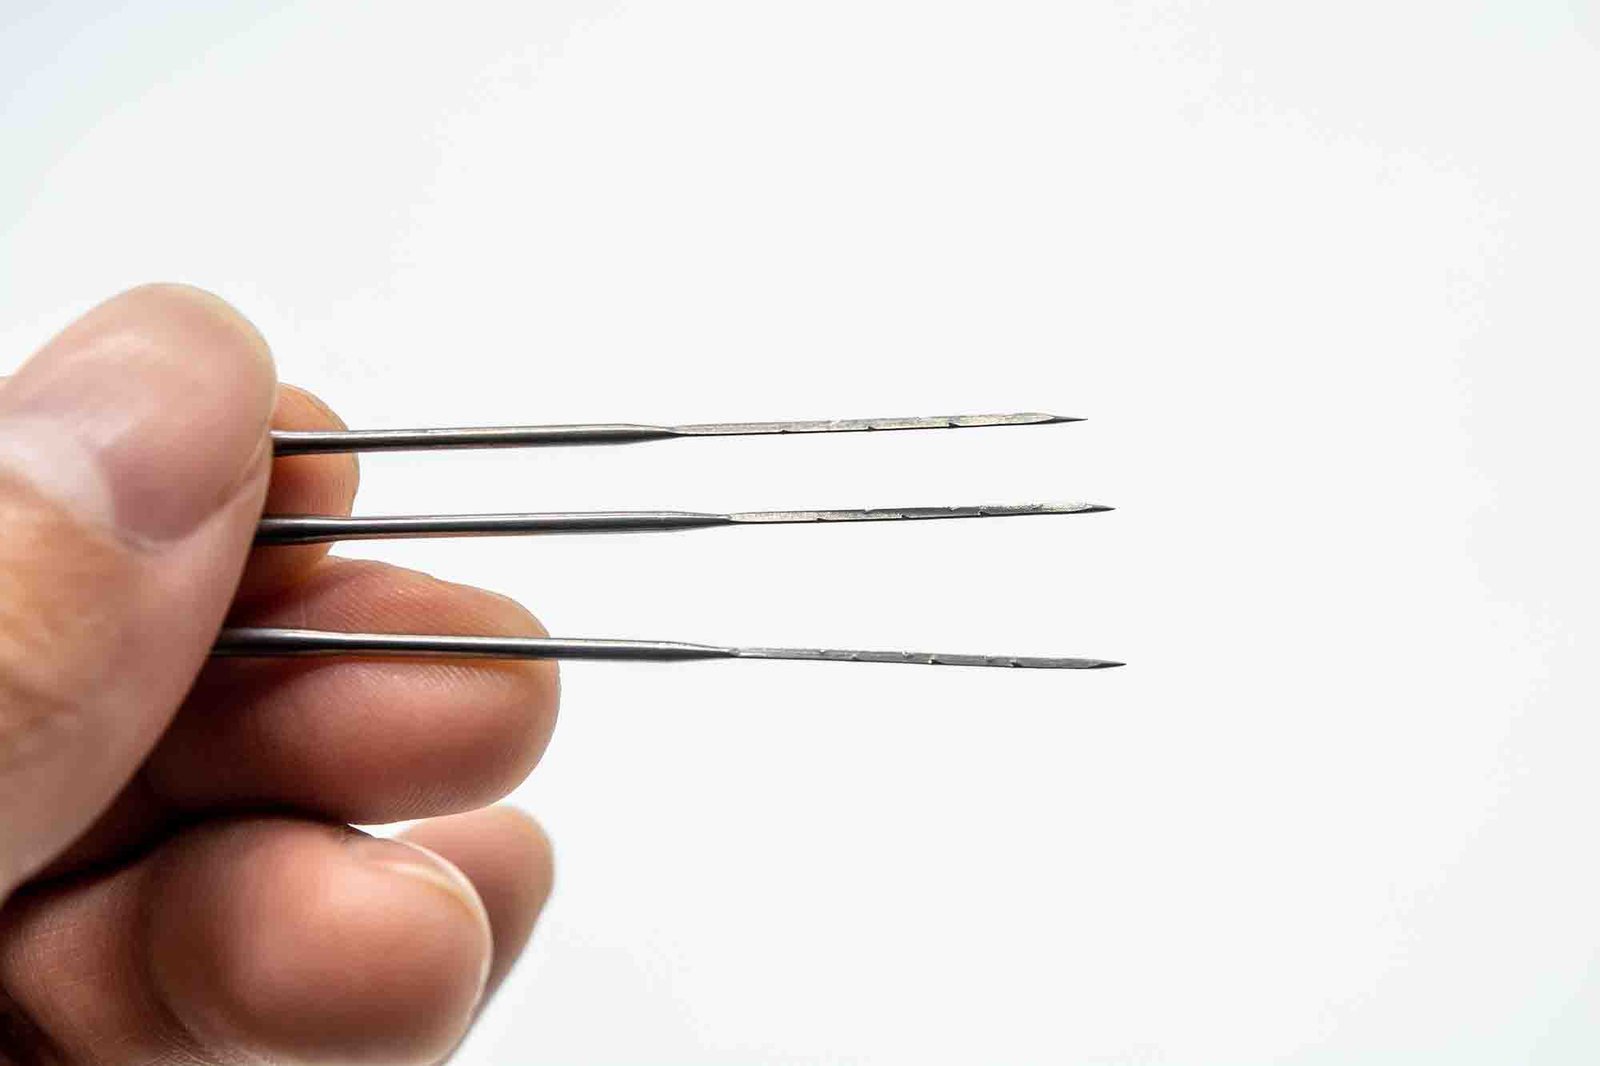
 Felting is a versatile art form that allows you to explore a range of techniques to create unique and intricate designs. One of the most popular techniques is needle felting, which uses a special needle to sculpt wool fibers into the desired shape and texture. This technique is perfect for adding details like facial features and small accessories like hats or bows.
Make sure to check out a few common mistakes during needle felting.
Another technique is wet felting, which involves agitating wool fibers with water and soap to create a firm and durable fabric. Wet felting is excellent for creating flat pieces or for forming the base of a 3D felted animal. You can also incorporate different colors and textures by layering wool fibers or adding yarns or fabrics to your project.
If you want to add some dimension and texture to your felted animal, consider using the Nuno felting technique. This method combines wool fibers with a lightweight fabric, such as silk or cotton, to create a textured surface that looks like felted wool but has a more delicate appearance. Nuno felting is ideal for creating intricate designs and adding a soft, flowing drape to your felted animal.
You can create unique felted animals showcasing your creativity and skill by experimenting with different techniques. Feel free to mix and match techniques or try something new to see what works best for your project. With a bit of practice and patience, you’ll soon be able to create felted animals that are beautiful and full of character.
Felting is a versatile art form that allows you to explore a range of techniques to create unique and intricate designs. One of the most popular techniques is needle felting, which uses a special needle to sculpt wool fibers into the desired shape and texture. This technique is perfect for adding details like facial features and small accessories like hats or bows.
Make sure to check out a few common mistakes during needle felting.
Another technique is wet felting, which involves agitating wool fibers with water and soap to create a firm and durable fabric. Wet felting is excellent for creating flat pieces or for forming the base of a 3D felted animal. You can also incorporate different colors and textures by layering wool fibers or adding yarns or fabrics to your project.
If you want to add some dimension and texture to your felted animal, consider using the Nuno felting technique. This method combines wool fibers with a lightweight fabric, such as silk or cotton, to create a textured surface that looks like felted wool but has a more delicate appearance. Nuno felting is ideal for creating intricate designs and adding a soft, flowing drape to your felted animal.
You can create unique felted animals showcasing your creativity and skill by experimenting with different techniques. Feel free to mix and match techniques or try something new to see what works best for your project. With a bit of practice and patience, you’ll soon be able to create felted animals that are beautiful and full of character.
How to Choose the Perfect Wool for Your Felted Animals?
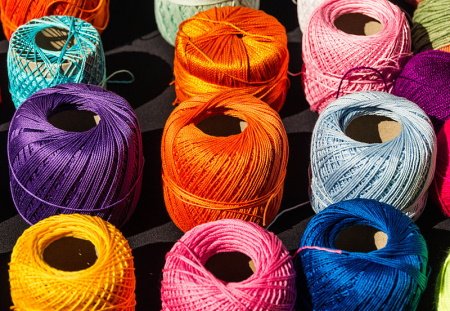 Choosing the ideal wool is crucial to create a felted animal that looks and feels amazing. The type of wool you use can affect your felt animal’s texture, finish, and overall quality. That’s why it’s essential to understand which type of wool is best for felting animals.
Generally, wool with a medium staple length and fine micron count is ideal for felting animals. Merino wool is famous for its softness, fineness, and ease of use. However, feel free to experiment with other wool types like alpaca, cashmere, or even synthetic fibers, which can have unique properties that require different techniques. You can create a unique felted animal with suitable wool and proper techniques.
Choosing the ideal wool is crucial to create a felted animal that looks and feels amazing. The type of wool you use can affect your felt animal’s texture, finish, and overall quality. That’s why it’s essential to understand which type of wool is best for felting animals.
Generally, wool with a medium staple length and fine micron count is ideal for felting animals. Merino wool is famous for its softness, fineness, and ease of use. However, feel free to experiment with other wool types like alpaca, cashmere, or even synthetic fibers, which can have unique properties that require different techniques. You can create a unique felted animal with suitable wool and proper techniques.
Creating a Basic Shape for Your Felted Animal
 One of the essential steps in creating a felted animal is establishing its basic shape.
A well-formed structure sets the groundwork for the details and character to bring your felted animal to life. Start by selecting the appropriate wool for the animal you want to make, as different wool types may affect the felting process differently. Once you’ve chosen your wool, you can start shaping it into the basic outline of your animal.
Two popular methods to create a basic shape are free-form and armature-based. The free-form technique manually manipulates the wool using a felting needle and your fingers to create the desired shape. This technique is often used for small or simple shapes, like spheres or cylinders, allowing for greater flexibility and spontaneity in the design. On the other hand, armature-based shaping uses a wireframe to create a more structured and stable shape. This technique is ideal for larger or more complex shapes and provides better support for the details and features you’ll add later.
Once you have created a rough outline, you can refine the shape by carefully felting the wool until it reaches the desired size and shape. Take your time and work in small sections, using a felting needle to poke and shape the wool gently. Pay attention to the proportions and symmetry of your animal’s body so it looks realistic and balanced. By establishing a solid foundation, you can build on the shape and transform it into a lifelike felted animal you can be proud of.
One of the essential steps in creating a felted animal is establishing its basic shape.
A well-formed structure sets the groundwork for the details and character to bring your felted animal to life. Start by selecting the appropriate wool for the animal you want to make, as different wool types may affect the felting process differently. Once you’ve chosen your wool, you can start shaping it into the basic outline of your animal.
Two popular methods to create a basic shape are free-form and armature-based. The free-form technique manually manipulates the wool using a felting needle and your fingers to create the desired shape. This technique is often used for small or simple shapes, like spheres or cylinders, allowing for greater flexibility and spontaneity in the design. On the other hand, armature-based shaping uses a wireframe to create a more structured and stable shape. This technique is ideal for larger or more complex shapes and provides better support for the details and features you’ll add later.
Once you have created a rough outline, you can refine the shape by carefully felting the wool until it reaches the desired size and shape. Take your time and work in small sections, using a felting needle to poke and shape the wool gently. Pay attention to the proportions and symmetry of your animal’s body so it looks realistic and balanced. By establishing a solid foundation, you can build on the shape and transform it into a lifelike felted animal you can be proud of.
Using a Reference Image for Inspiration
 One way to take your felted toys to the next level is by using a reference image for inspiration. Whether it’s a photograph, a drawing, or even a toy, a reference image can be an incredibly helpful tool when shaping your felted animal. By looking at the image, you can better understand the proportions, colors, and textures of the animal you’re trying to create.
When using a reference image, paying close attention to the details is essential. Take note of the animal’s facial features, such as the shape of the nose and the placement of the eyes. You can also study the pattern of the fur or feathers to help you create a realistic texture. Remember, the more attention you pay to these details, the more lifelike your felted animal will appear.
Using a reference image can also help you make creative decisions about your felted animal. For example, you might add a unique twist to the animal by giving it a different coat color or adding accessories like a scarf or hat. The possibilities are endless when you let your creativity run wild. So, grab your reference image, and let’s start creating the perfect felted animal!
One way to take your felted toys to the next level is by using a reference image for inspiration. Whether it’s a photograph, a drawing, or even a toy, a reference image can be an incredibly helpful tool when shaping your felted animal. By looking at the image, you can better understand the proportions, colors, and textures of the animal you’re trying to create.
When using a reference image, paying close attention to the details is essential. Take note of the animal’s facial features, such as the shape of the nose and the placement of the eyes. You can also study the pattern of the fur or feathers to help you create a realistic texture. Remember, the more attention you pay to these details, the more lifelike your felted animal will appear.
Using a reference image can also help you make creative decisions about your felted animal. For example, you might add a unique twist to the animal by giving it a different coat color or adding accessories like a scarf or hat. The possibilities are endless when you let your creativity run wild. So, grab your reference image, and let’s start creating the perfect felted animal!
Add Details to Your Felted Animal
 Adding small details is where your felted animal starts to come to life! Once you have created your animal’s basic shape, you can add all the details that make it unique and special. Whether adding fur to a teddy bear or feathers to a bird, adding details requires patience and attention to detail.
To create realistic texture and depth, it’s best to add details in layers. If making a furry animal, start by felting a base layer of wool to create a smooth surface. Then, add finer fibers on top to create the appearance of fur. Use a felting needle to gently blend the layers, ensuring not to over-felt and lose the fluffy texture. You can also add different colors and shades to create highlights and shadows. For example, adding a lighter shade around the edges of the fur can make it appear more three-dimensional and realistic.
Taking your time and working in small sections is essential when adding details. Focus on one area at a time, such as the head or paws, and then move on to the next. Adding details like facial features, markings, or textures is best. Working in small sections ensures that each part of your felted animal receives the attention it deserves and that the finished product is cohesive and visually pleasing.
Remember, felting is a forgiving medium; you can always add more wool or adjust the shape as you go. If a detail isn’t working out, you can always take it out and try again. And don’t be afraid to experiment! Felting allows for endless creativity, and adding your unique spin to your felted animal can make it even more special and meaningful.
Adding small details is where your felted animal starts to come to life! Once you have created your animal’s basic shape, you can add all the details that make it unique and special. Whether adding fur to a teddy bear or feathers to a bird, adding details requires patience and attention to detail.
To create realistic texture and depth, it’s best to add details in layers. If making a furry animal, start by felting a base layer of wool to create a smooth surface. Then, add finer fibers on top to create the appearance of fur. Use a felting needle to gently blend the layers, ensuring not to over-felt and lose the fluffy texture. You can also add different colors and shades to create highlights and shadows. For example, adding a lighter shade around the edges of the fur can make it appear more three-dimensional and realistic.
Taking your time and working in small sections is essential when adding details. Focus on one area at a time, such as the head or paws, and then move on to the next. Adding details like facial features, markings, or textures is best. Working in small sections ensures that each part of your felted animal receives the attention it deserves and that the finished product is cohesive and visually pleasing.
Remember, felting is a forgiving medium; you can always add more wool or adjust the shape as you go. If a detail isn’t working out, you can always take it out and try again. And don’t be afraid to experiment! Felting allows for endless creativity, and adding your unique spin to your felted animal can make it even more special and meaningful.
Using Different Felting Techniques
 Felting is a versatile art form that allows you to explore a range of techniques to create unique and intricate designs. One of the most popular techniques is needle felting, which uses a special needle to sculpt wool fibers into the desired shape and texture. This technique is perfect for adding details like facial features and small accessories like hats or bows.
Make sure to check out a few common mistakes during needle felting.
Another technique is wet felting, which involves agitating wool fibers with water and soap to create a firm and durable fabric. Wet felting is excellent for creating flat pieces or for forming the base of a 3D felted animal. You can also incorporate different colors and textures by layering wool fibers or adding yarns or fabrics to your project.
If you want to add some dimension and texture to your felted animal, consider using the Nuno felting technique. This method combines wool fibers with a lightweight fabric, such as silk or cotton, to create a textured surface that looks like felted wool but has a more delicate appearance. Nuno felting is ideal for creating intricate designs and adding a soft, flowing drape to your felted animal.
You can create unique felted animals showcasing your creativity and skill by experimenting with different techniques. Feel free to mix and match techniques or try something new to see what works best for your project. With a bit of practice and patience, you’ll soon be able to create felted animals that are beautiful and full of character.
Felting is a versatile art form that allows you to explore a range of techniques to create unique and intricate designs. One of the most popular techniques is needle felting, which uses a special needle to sculpt wool fibers into the desired shape and texture. This technique is perfect for adding details like facial features and small accessories like hats or bows.
Make sure to check out a few common mistakes during needle felting.
Another technique is wet felting, which involves agitating wool fibers with water and soap to create a firm and durable fabric. Wet felting is excellent for creating flat pieces or for forming the base of a 3D felted animal. You can also incorporate different colors and textures by layering wool fibers or adding yarns or fabrics to your project.
If you want to add some dimension and texture to your felted animal, consider using the Nuno felting technique. This method combines wool fibers with a lightweight fabric, such as silk or cotton, to create a textured surface that looks like felted wool but has a more delicate appearance. Nuno felting is ideal for creating intricate designs and adding a soft, flowing drape to your felted animal.
You can create unique felted animals showcasing your creativity and skill by experimenting with different techniques. Feel free to mix and match techniques or try something new to see what works best for your project. With a bit of practice and patience, you’ll soon be able to create felted animals that are beautiful and full of character.